Looking to enhance your music experience on your Apple laptop? If you’re a proud owner of Beats headphones, you’re in for a treat! In this comprehensive guide on “How to Add Beats Headphones to Apple Laptop” we will walk you through the simple steps to pair these premium headphones seamlessly with your device.
Whether you use your laptop for work, entertainment, or both, having the right audio setup can make a world of difference. Get ready to elevate your sound quality and immerse yourself in crystal-clear audio as we unravel the key to unlocking the perfect harmony between your Beats headphones and Apple laptop.
List of Contents
- How to Pair Beats Solo 2 to Windows PC – Connect Beats Bluetooth Headphones Wirelessly
- 5 Steps to Connect Beats Headphones to Your Apple Laptop
- How to Connect Beats Solo 3 to Macbook?
- How to Connect Beats to Macbook Pro
- How to Connect Beats to Macbook Air
- How to Connect Beats Studio to Macbook
- How to Connect Wireless Beats to iPhone
- Why Won’t My Beats Connect to My Mac?
- How to Connect Beats to iPad?
- How to Connect Beats Studio Buds
- How Do I Connect My Beats Headphones to My Mac Laptop?
- How Do I Add Beats to My Apple Devices?
- Why are My Beats Not Showing Up on Bluetooth?
- Can I Connect My Wireless Beats to My Laptop?
- Conclusion
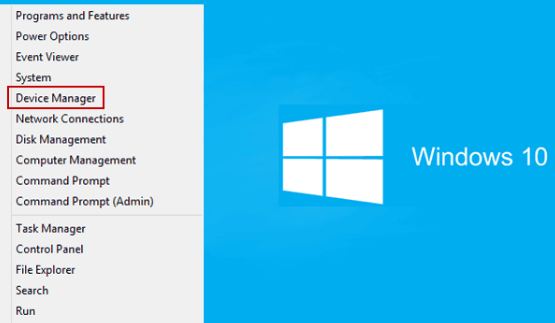
How to Pair Beats Solo 2 to Windows PC – Connect Beats Bluetooth Headphones Wirelessly
5 Steps to Connect Beats Headphones to Your Apple Laptop
Note: These steps assume you’re using Bluetooth Beats headphones. If you have wired Beats, simply plug them into the headphone jack on your laptop.
Step 1: Turn on Your Beats Headphones
- Locate the power button on your headphones.
- Press and hold it until the power indicator light starts flashing. This indicates that your headphones are in pairing mode
Step 2: Enable Bluetooth on Your Mac
- Click on the Apple menu in the top left corner of your screen.
- Select “System Settings”
- Click on “Bluetooth”.
- Ensure that Bluetooth is turned on
- Your Mac will automatically start searching for nearby Bluetooth devices.
- Wait for your Beats headphones to appear on the list of devices.
Step 4: Pair Your Headphones
- Click on the name of your Beats headphones in the list.
- A pairing code might appear on both devices. Ensure they match before proceeding.
- Click “Connect” on your Mac.
Step 5: Verify Connection
- Once paired, you should see your Beats headphones listed under the “Devices” section with a “Connected” status.
- Play some audio to confirm the connection.
Additional Tips:
- If you’re having trouble connecting, try forgetting the device on both your headphones and Mac, then pair them again. If you can’t connect to your wireless Beats product – Apple Support (SA)
- Ensure your Beats headphones are fully charged.
- Check for any software updates for both your Mac and your Beats headphones.
- If you’re using Beats Studio3 or newer models, you might need to press and hold the power button for longer to enter pairing mode.
By following these steps, you should be able to successfully connect your Beats headphones to your Apple laptop.
How to Connect Beats Solo 3 to Macbook?
Beats Solo 3 is one of the most popular headphones on the market, and for good reason. They offer great sound quality, comfort, and style. But if you’re a Mac user, you might be wondering how to connect your Beats Solo 3 to your computer. Fortunately, it’s quite simple. Here’s a step-by-step guide on how to do it:
1. Make sure that your Beats Solo 3 is powered off. Then, take the included USB cable and plug it into the charging port on the right ear cup of the headphones.
2. Next, plug the other end of the USB cable into one of the USB ports on your Macbook.
3. Once the connection is made, you should see a small LED light on the right ear cup of the Beats Solo 3 flashing white. This indicates that they’re in pairing mode.
How to Connect Beats to Macbook Pro
If you’re a music lover, you probably have a pair of Beats headphones. They’re great for listening to music on the go, but what if you want to use them with your Macbook Pro? It’s pretty easy to do, and we’ll show you how in this blog post.
First, make sure that your Beats headphones are charged. Then, open up the Bluetooth settings on your Macbook Pro. Click the “Add Device” button and put your Beats into pairing mode by pressing and holding the power button for 5 seconds.
Your Macbook Pro should now be able to find and connect to your Beats headphones. Now that you’re connected, you can adjust the volume directly from your Macbook Pro or use the inline remote control on your Beats headphones to change tracks or pause/play your music.
You can also use Siri with your Beats headphones by saying “Hey Siri” followed by a voice command. So whether you’re at home or on the go, enjoy using your Macbook Pro and Beats headphones together!
How to Connect Beats to Macbook Air
If you have a pair of Beats headphones and want to use them with your Macbook Air, there are a few different ways you can go about doing this. The simplest way is to just plug the headphones into the 3.5mm headphone jack on the side of the laptop. However, if you want to take advantage of the better sound quality that Bluetooth offers, you can connect your Beats to your Macbook Air using Bluetooth.
Here’s how: First, make sure that both your headphones and laptop are charged and within range of each other (about 30 feet). Then, put your Beats into “pairing mode” by holding down the power button for 5 seconds until you see a white light flashing.
On your Macbook Air, open up System Preferences from the dock and click on “Bluetooth.” Your computer should now start scanning for nearby devices – when it finds your Beats headphones, click on their name to connect. Once connected, you should be able to adjust volume levels and play/pause music directly from your Macbook Air’s trackpad or keyboard.
Enjoy wirelessly listening to music or movies on your Macbook Air with ease! If you have any trouble connecting or run into any audio quality issues, try restarting both devices or moving closer together before trying again.
How to Connect Beats Studio to Macbook
If you have a Beats Studio and a Macbook, you may be wondering how to connect the two devices. Here are some simple instructions on how to do just that:
1. Make sure that both the Beats Studio and the Macbook are turned on and in range of each other.
2. On the Beats Studio, press the power button to enter pairing mode. The LED indicator will flash red and white when in pairing mode. 3. On your Macbook, open System Preferences > Bluetooth.
Make sure that Bluetooth is turned on. 4. Your Macbook should now detect the Beats Studio in pairing mode. Click on “Pair” next to the listing for the headphones to connect them wirelessly to your computer.
How to Connect Wireless Beats to iPhone
Beats headphones are some of the most popular on the market, and for good reason. They’re stylish, they sound great, and they’re comfortable to wear. But one thing that can be a bit tricky is connecting them to your iPhone wirelessly.
Here’s a quick guide on how to do just that. First, make sure that your Beats headphones are in pairing mode. You can do this by pressing and holding the power button for five seconds until you see the LED light flashing white.
Next, open up the Settings app on your iPhone and tap Bluetooth. You should see your Beats headphones listed under Other Devices – tap on them to connect. Once you’re connected, you can adjust the volume directly from your iPhone as well as play/pause/skip tracks from your music library. And that’s it – enjoy your tunes!
Why Won’t My Beats Connect to My Mac?
If you’re having trouble connecting your Beats headphones to your Mac, there are a few things you can try to troubleshoot the issue. First, make sure that your Beats are properly charged and that you’re using the correct charging cable. If your Beats still won’t connect, try restarting both your headphones and your Mac.
You should also check to see if there’s a firmware update available for your headphones. If all else fails, contact Apple Support for further assistance.
How to Connect Beats to iPad?
Beats are one of the most popular headphones on the market, and for good reason. They’re comfortable, they look great, and they sound even better. But if you’re an iOS user, you might be wondering how to connect your Beats to your iPad.
Luckily, it’s not as difficult as it might seem. In this blog post, we’ll walk you through everything you need to know about connecting your Beats to your iPad, including what cables you need and how to set up the connection. First things first: in order to connect your Beats to your iPad, you’ll need a Lightning cable (the same cable that you use to charge your iPhone).
Once you have that, simply plug one end of the cable into the headphone jack on your Beats and the other end into the Lightning port on your iPad. From there, all you need to do is open up the Settings app on your iPad and navigate to Bluetooth. Make sure that Bluetooth is turned on, then select “Beats Solo3 Wireless” from the list of available devices.
Once connected, you should hear a confirmation tone from your headphones and see a blue light appear on the back of them. That’s it! You’re now ready to listen to music wirelessly from your iPad with ease.
How to Connect Beats Studio Buds
Beats Studio Buds are earbuds that were designed to provide a comfortable listening experience while being lightweight and stylish. They come with three different-sized ear tips so you can find the perfect fit, and they have an inline remote that lets you control your music without having to take your phone out of your pocket. Here’s how to connect them to your device:
1. Make sure that both your Beats Studio Buds and your Bluetooth device are turned on and in range of each other.
2. On your Beats Studio Buds, press and hold the power button for two seconds until the LED flashes white. This means that they’re in pairing mode.
3. On your Bluetooth device, find the list of available devices and select “Beats Studio Buds” from the list.
4. Once connected, you’ll see a white LED on your earbuds, indicating that they’re ready to use.
5. Enjoy your music!

Credit: www.alphr.com
How Do I Connect My Beats Headphones to My Mac Laptop?
Beats headphones are one of the most popular choices for people who want good-quality audio, and they can be used with a Mac laptop by following a few simple steps. To start, make sure that the Beats headphones are powered off. Once they are, find the small circular port on the bottom of the left ear cup and insert the 3.5mm end of the headphone cable into it.
Next, locate your Mac’s headphone jack. It will likely be on the side or back of the computer, and will have a symbol next to it that looks like a pair of headphones. Insert the other end of the headphone cable into this jack.
Now you should hear sound coming through your Beats headphones! If you want to use them for making calls as well as listening to music, you’ll need to connect them wirelessly using Bluetooth. To do this, open up System Preferences on your Mac and click on “Bluetooth.”
Make sure that Bluetooth is turned on, then click “Pair” next to your Beats headphones in the list of devices. Follow any prompts that come up until pairing is complete – once it is, you’ll see a green checkmark next to your Beats headphones in Bluetooth preferences. And that’s it – enjoy your music!
How Do I Add Beats to My Apple Devices?
Assuming you would like a blog post discussing how to add beats to Apple devices: There are a few different ways that you can go about adding beats to your Apple device. One way is to purchase and download them from the iTunes Store.
Another way is to sync your device with an existing iTunes library on your computer. And finally, you can also use the iCloud Music Library to access your music files from anywhere. Let’s take a closer look at each of these methods in more detail.
If you want to purchase and download beats from the iTunes Store, simply open up the store app on your device and browse for the type of music or beat that you’re looking for. Once you find something that you like, tap on the price next to it and confirm your purchase with your fingerprint or Face ID (if applicable). The file will then begin downloading onto your device.
To sync your device with an existing iTunes library on your computer, first make sure that both devices are connected to the same Wi-Fi network. Then open up iTunes on your computer and select the “Devices” tab from the top menu bar. Next, click on “Sync” next to your device in the sidebar menu.
A new window will pop up asking what type of content you’d like to sync – make sure that “Music” is selected and then click “Sync.” Your computer will start transferring any music files over to your device. Finally, if you have an iCloud Music Library enabled, you can access all of your music files from anywhere as long as you’re connected to the internet.
To do this, simply open up the Music app on any of your Apple devices and sign in with your Apple ID at the bottom of the screen. Once signed in, all of yourmusic should appear in the app’s Library section regardless of which device it was originally added to – pretty neat!
Why are My Beats Not Showing Up on Bluetooth?
If your Beats aren’t showing up on Bluetooth, there are a few things you can try to fix the issue. First, make sure that your Beats are fully charged. If they’re not, plug them in and wait a few minutes to see if that does the trick.
If your Beats still aren’t appearing on Bluetooth after they’re charged, try resetting them. To do this, press and hold the power button for 10 seconds. Once your Beats have been reset, try connecting to Bluetooth again.
If you’re still having trouble connecting your Beats to Bluetooth, there may be an issue with the device you’re trying to connect them to. First, check to make sure that the device supports Bluetooth audio. If it does, then try restarting both the device and your Beats. Sometimes all it takes is a fresh start! Still, having trouble? There are a few other things you can try:
Make sure that you’re within range of the device you’re trying to connect to (usually 30 feet or less). – Check for any software updates for both your Beats and the device you’re trying to connect them to. Try connecting your Beats to anotherdevice (like your phone)to see if the issue is with just one particular device or if it’s more widespread. We hope these tips help get your Beats working wirelessly via Bluetooth!
Can I Connect My Wireless Beats to My Laptop?
Yes, you can connect your wireless Beats to your laptop. There are a few different ways to do this, depending on what type of Beats you have and what type of laptop you have. If you have Bluetooth-enabled Beats, you can simply pair them with your laptop by following the pairing instructions in the owner’s manual.
Once they’re paired, you’ll be able to listen to audio from your laptop through the Beats. If your Beats don’t have Bluetooth, or if you want to use a wired connection for better sound quality, you can connect them to your laptop using the included 3.5mm audio cable. Just plug the cable into the headphone jack on your Beats and then into the audio input port on your laptop. You may need to adjust your computer’s sound settings to get the best sound quality.
Conclusion
In conclusion, integrating Beats headphones with your Apple laptop is a seamless process that enhances your audio experience. By following the simple steps outlined in this guide on ‘How to Add Beats Headphones to Apple Laptop,’ you can elevate your music, movies, and calls to new heights of clarity and precision.
So go ahead, connect your Beats headphones to your Apple laptop today, and immerse yourself in the world of unparalleled sound quality like never before. Let the perfect harmony between technology and innovation accompany you on your audio journey.


